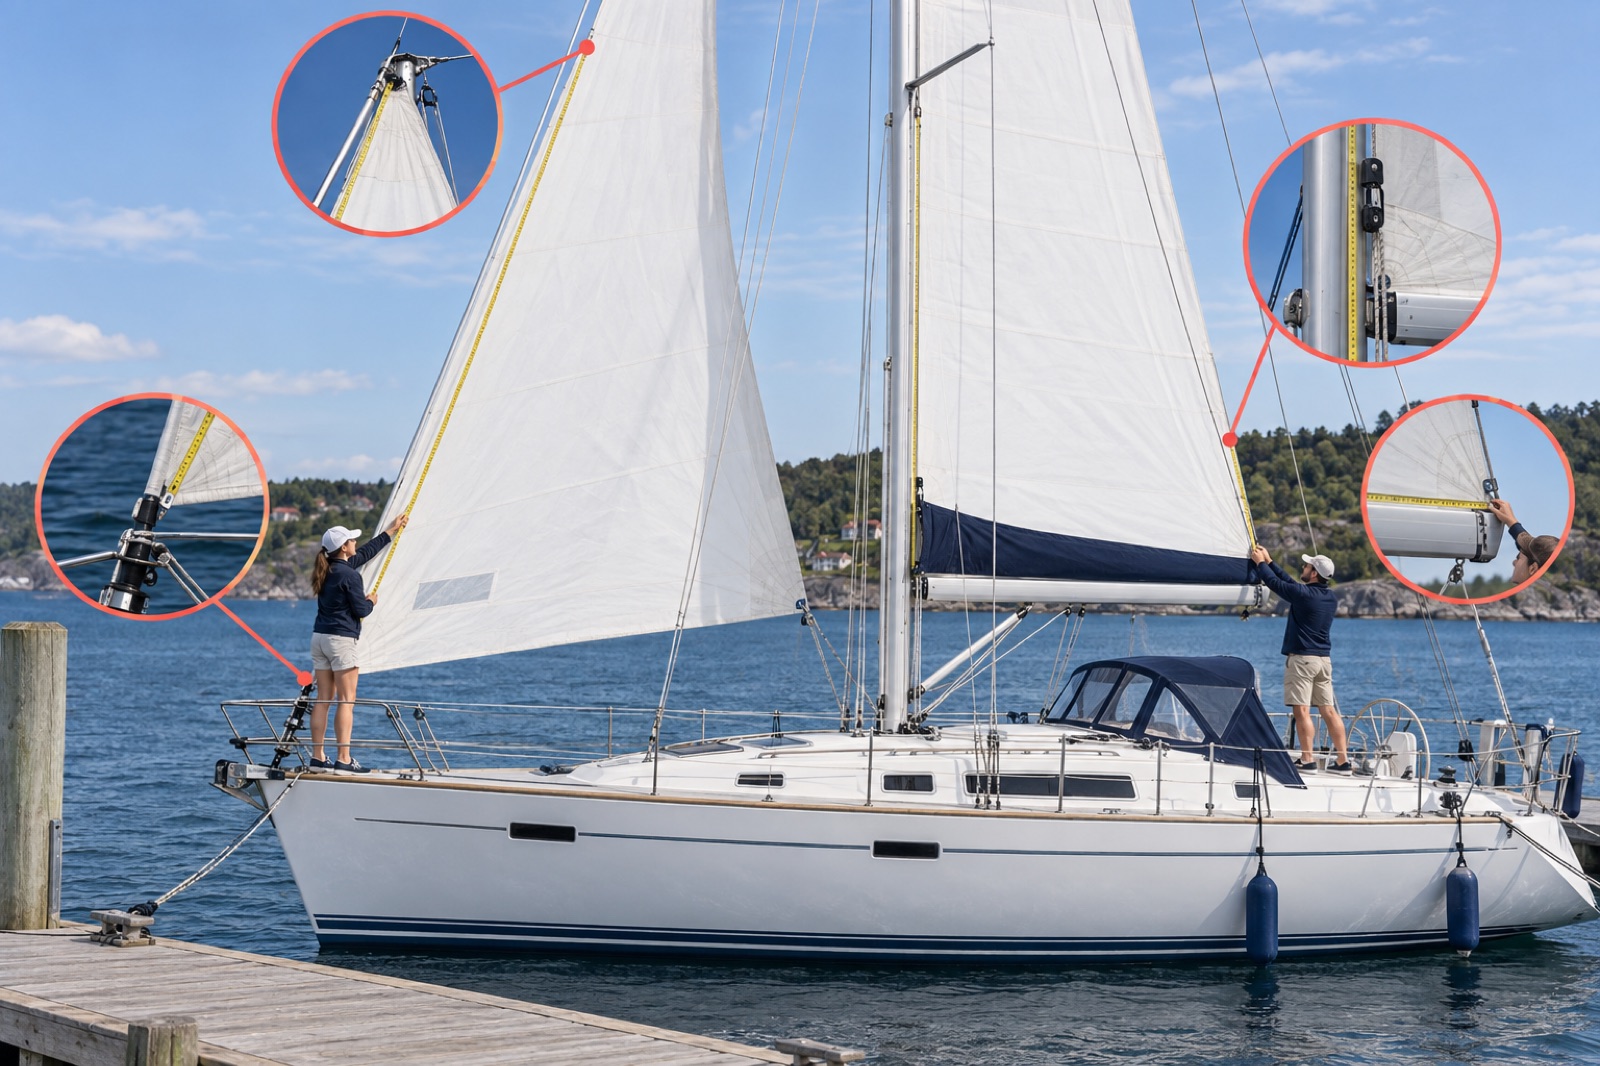
Short answer: Good photographs do not replace measurements. They show the sailmaker what the numbers connect to and expose hardware, clearance or modification details that a model name hides.
Start with whole-boat context
Take square, well-lit views from the bow, stern and both sides with the mast and boom visible. Add a masthead-to-deck view where practical and safe. Note the date, whether the rig was fully tensioned and whether the boom was in its normal sailing position.
Photograph every attachment
Capture the tack, clew, head, halyard shackle, luff groove or hanks, furler drum and top swivel. For a mainsail, include the gooseneck, outhaul, reef hooks, reef lines, mast gate, slides or cars and lazy-bag opening. Put a ruler in frame when scale is unclear.
Show sheet leads and clearance
Photograph headsail tracks from above and along the deck, plus blocks, cars, lifelines, spreaders, shrouds and pulpits. For reaching sails, show the forward tack point, bowsprit, anchor clearance and furler. A clear wide view followed by a close-up is more useful than a close-up with no location context.
Record the existing sail methodically
Lay the sail cleanly on a suitable surface or photograph it hoisted in light conditions. Include labels, serial numbers, cloth markings, luff tape, hardware, reef points and damage. Photograph a tape measure at key dimensions without bending it around corners, then send the completed measurement form with the images.
Practical checklist
- Bow, stern and both profile views
- Masthead, forestay and furler components
- Tack, clew, head and luff attachment
- Tracks, blocks, shrouds and spreader clearance
- Boom, reefing and luff hardware
- Existing-sail labels, dimensions and damage
- One wide context image for every close-up
If structural cloth, corner attachments, seams, laminate bond or hardware appear weakened, remove the sail from service and ask a qualified sailmaker to assess it. A cleaning or cover repair is not a structural certification.